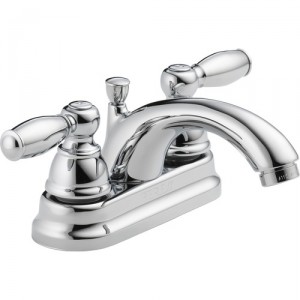
B athroom faucet replacement is a job that most homeowners will eventually encounter. This does not have to be a daunting task. With the proper guidance replacement of a bathroom faucet is a simple project. Follow the instructions below on how to replace a bathroom faucet which are listed in an easy step by step fashion. As well, you will learn how to remove an old bathroom faucet with ease.
Replacing a bathroom faucet does not require the help of a plumber. You will be able to accomplish this feat on your own. However, you will need some materials to work with. Here is a list of things you will need to gather before beginning the job.
• A new faucet set
• Light for under the sink
• Container of vinegar
• A pair of large pliers for gripping
• A basin wrench
Now that you have gathered the proper supplies you are ready to begin replacing the bathroom faucet. Simply follow the steps below. You will find the job surprisingly easy.
Step 1
Remove all items from beneath the bathroom sink. You will need adequate space to work.
Step 2
Place a lighting source under the sink. A portable lamp works well for this. You will need a large amount of light.
Step 3
You are now ready to turn off the water supply to the faucet. You will see two lines coming out of the wall. One of these is a hot water line. The other is a cold water line. Beside each line you will see a small metal handle. These are called valves. Each of these valves will turn like a water faucet. Turn them both clockwise as far as they will comfortably go. This turns off the water supply.
Step 4
Place a towel under the valves. Just above the valve on each tube you will see a large nut. Loosen these on each tube. Lift each tube out of the valve. A small amount of water will drain onto the towel. Do not panic. This is normal. It is simply the remainder of the water from the faucet.
Step 5
Use the basin wrench to loosen the large nuts which secure the faucet in place. There may be anywhere from one to three nuts. Each type of faucet is made differently.
Step 6
The securing hardware is now removed. The old bathroom faucet will simply lift up. Pull it and the tubes free of the sink.
Step 7
Thoroughly inspect each tube. If you find any cracks, tares, or holes you will need to replace them. If there is no damage these tubes may be used again.
Step 8
Completely clean the sink where the old faucet sat. If you encounter hard to remove water deposits use vinegar. Vinegar will dislodge hard water deposits.
Step 9
Your new faucet kit should include a plastic gasket. Place this at the base of the new faucet. This is what will prevent leaks.
Step 10
Secure the tubes to the faucet.
Step 11
Read the faucet instructions. If there are any face plates or additional tubes attach them now.
Step 12
Place the faucet in the holes in the sink. Be careful to position the tubes as needed.
Step 13
Begin tightening the nuts under the sink. However, stop before they are completely tight.
Step 14
Check the faucet and make sure that it is properly positioned.
Step 15
Once you have the faucet straight and in position finish tightening the nuts.
Step 16
Place the tubes in each valve. Tighten the tube nuts.
Step 17
Turn on the hot and cold water valves.
Step 18
Make certain there are no leaks.
You are finished. Your new bathroom faucet is installed. You have accomplished this job without the help of a professional plumber. Bathroom faucet replacement really is this simple.